Feeds:
Posts
Comments

Archive for the ‘Black Walnuts’ Category

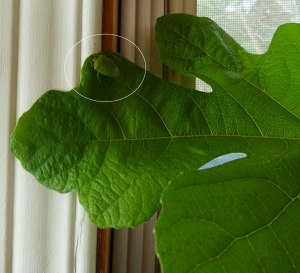
Fig with matching Bug

Fig with matching Bug

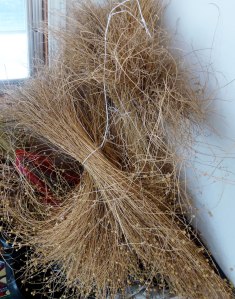
The back porch is the closest I can get to a cool greenhouse. It has windows on three sides, and is heated with electric baseboard heaters that are turned down to 40F most of the winter. This makes it a great place to over-winter the fig tree and any remnants of outdoor pots that I can’t bear to toss out in the Fall. It’s also a catch-all for garden remnants that are awaiting further processing. This includes several year’s worth of flax plants and a container of black walnuts (the hulls are another story).

This year, the fig tree started putting out leaves in February, which seems a little early, but so far it seems happy enough and is sporting a little bug that perfectly matches the green of the leaves.

In spite of having two years worth of flax to experiment with, of course I’m planning to plant and harvest some more this year. I suspect that it takes a great deal of raw fibre to produce even a very small amount of linen thread, so the more the better.

Flax Bundles

Flax Bundles

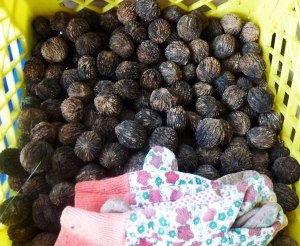
The black walnuts are enjoying their second winter in the porch, so it may be time to make a present of them to the local squirrels. I’m always amazed that they are so good at getting at the kernels, a job I do not greatly enjoy doing myself.

Black Walnuts

Black Walnuts

Next on the agenda is a trip to the farm to put out a few sap buckets and see if we can make a few litres of maple syrup. It’s fun to get outdoors on a sunny day in March and listen to the patter of the sap droplets in the buckets and poke at the wood fire that we use to boil down the sap. Cold, but fun.
Read Full Post »

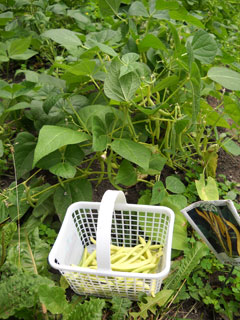
First Wax Beans - 2012

First Wax Beans – 2012

This is the first picking of beans for this year. There are now plenty of yellow (wax) and green beans that are almost ready to eat, so it’s time to find some good recipes so we don’t get tired of beans every day…

It’s been very hot and dry until last night when it finally rained and cooled off some. Even though it’s been hot, I think the garden is off to a slower start than last year.

Here are some late-July shots to show how everything looks today:


Tomatoes are forming, but are still green so far:

Green Tomatoes

Green Tomatoes


New leaves on Cotton

The cotton didn’t go outside as early as last year, and hasn’t even formed squares yet. There is some new growth, so I’m still hopeful that some bolls will have time to develop.


Madder – second year


The second year Madder withstood the dry conditions extremely well and is very glossy and prickly.


And the new Black Walnut seedling has been planted at a good distance from the garden. It’s looking very well!

Black Walnut seedling

Read Full Post »

wool simmered and soaked overnight (left), wool soaked overnight (right)

To test the dye potential of the Black Walnut hulls I’ve been removing, I soaked a small skein of yarn overnight in the tub where the walnuts have been soaking in water. I liked the colour so much that I decided to make a proper dye-bath to see what would happen.

I half-filled my dye-pot with hulls, added enough water to cover them and simmered the liquid for an hour. The pot was then cooled and the hulls filtered out, leaving a very dark brown dye-bath. A pre-wetted skein of wool was added and the pot was retuned to a low heat and simmered for another hour. The heat was then turned off and the skein was left to soak in the dye-bath overnight. Here are the results – I think I like black walnut dyeing!

Read Full Post »

The first week of September, the nuts started to fall. This appears to be the best year yet for quantity and there are plenty to share with the red squirrel who is very territorial about them.

To actually use the nutmeat, the outer covering must be removed, then the shell cracked and the edible parts removed. Sounds simple, but the outer covering is tough and the shells are incredibly hard to crack without pulverizing the nut inside.

Stage One:

Soak the nuts to soften up the outer covering so that it can be removed.

It takes about a week of soaking to soften up the fresh green hulls.

Stage Two:

Remove the hulls with a sharp knife (wearing old clothes and rubber gloves!) and then clean the shells with a pressure washer. Many of the nut shells are completely blackened by contact with the juice in the hulls, but I don’t think it affects the flavour of the nutmeat. The liquid is a powerful natural dye, and I plan to save the hulls and experiment with it as a dyestuff.

Lay the nuts in a single layer on a screen to dry.

Stage Three (future):

Crack the shells – I use a heavy hammer on a concrete floor and cover the the nuts with a tea towel to prevent the sharp shell fragments from flying.  The inner sections of the shell are also very hard, so it’s a challenge to get reasonably sized pieces. Store the nutmeat in the freezer unless it is used right away. The nutmeat can be lightly toasted before use.

A small mystery:

Amongst the Black Walnuts, we’ve found a few Butternuts. We don’t posses a mature Butternut tree, but suspect that a squirrel passing through with a butternut decided that a walnut (being bigger) was a better find and dropped one nut for the other.

Read Full Post »