Feeds:
Posts
Comments

Posts Tagged ‘natural dyes’

Flax-August

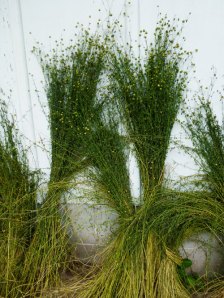
First Flax pulled – August, 2013

I started pulling the Flax on August 4th. It’s still quite green, but there is some yellow in the stems and seed heads. I’ll continue to pull and dry bunches of it until it gets browner and then I’ll finish pulling the rest. This is about 80 days since it was sown, and this gradual pulling approach should take me to the 100 day mark. The bunches already pulled are sitting under an overhang, but still get a lot of sun and warmth. I hope that pulling it while still immature will yield a finer fibre.

P1000735

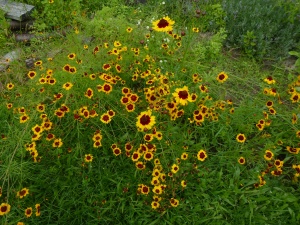
Coreopsis (Dyer’s Tickseed)

The Coreopsis (Dyer’s Tickseed) is doing well, and I should get out there and collect some flower heads for a small dye vat. This clump seeded itself, but the area I planted this Spring, is just starting to come into flower. Along the roads, the Goldenrod is blooming – another plant I’d like to use this summer. Golden flowers are overtaking the garden – a last glow of summer sunshine!

Read Full Post »

P1000706

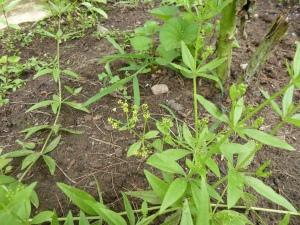
Madder blossoms

The Madder plants that I have been growing for the past three years were all started from seed. The germination rate has been very good – I’d say over 75%, and the plants were fairly easy to transplant into the garden. Once established (second or third year) they started to spread nicely and this year some second-season plants have bloomed!

There is still some room in the Madder patch, so I’ve attempted 2 methods to establish some additional plants – cuttings rooted in pots of soil, and using wire staples to keep longer shoots on existing plants in place in the soil so they develop roots of their own, much like strawberry runners do.

The cuttings are a second attempt – first time I put some in a jar of water (with a small shoot of willow to encourage rooting) and all they did was rot. Most of the cuttings in pots rotted as well, but a couple did root and have now been planted out in the Madder patch.

I think it’s too soon to tell if the shoots held down in the soil with staples (made from lengths of hanger wire) are rooting themselves. They do look healthy, but they are still attached to the parent plants.

Madder appears to be a nice hardy plant in our 3a (Canadian climate) zone. It grows best in the same conditions that Lavender likes.

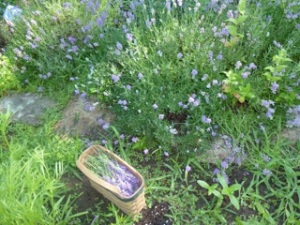
I’ve tried all the same methods to propagate Lavender, with no success – has anyone been able to propagate Lavender from cuttings? How did you get it to root?

P1000690

Lavender that will not root

Read Full Post »

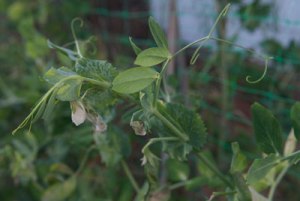
It’s been a good year for the vegetable garden, which prompted me to try to extend the season a little longer. A second planting of edible pod peas in August has produced a nice crop and there are still a few blossoms on the vines, even though we’ve had many below-freezing nights already.

Pea blossoms


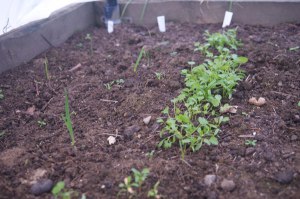
As the night temperatures dropped below freezing, I covered a small raised bed in which a second crop of cilantro and some garlic has been planted. The smaller the plants, the better the flavour it seems with cilantro, so it’s a good candidate for periodic replanting. The colder it gets, the more layers I’ve added so the bed now has two layers of crop cover material and a clear plastic shower curtain on top supported by 3′ high plastic hoops. The air temperature inside varies between -2 C and 8 C and the cilantro and garlic both seem to be fine with this temperature range. The days are short and often overcast, so the rate of growth is not what it is in the summer, but I still have hopes of a little more fresh cilantro this Fall.

Cilantro and Garlic in covered bed

It hasn’t been a good year for the cotton plants, but they are now inside again, and there are some buds and the occasional blossom and boll, but these are much later then they were last year, when blossoms were more numerous and fewer buds were dropped. I’ll try for fewer plants in deeper pots next season to see if that helps. In the meantime, I’ll try to overwinter the strongest plants from this season and see if they eventually produce some fibre.

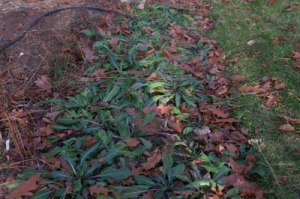
The dye plants are looking healthy, and I’m tempted to harvest another cutting of Woad before the leaves are covered with snow for the winter.

Woad leaves in November

Madder – first season plant

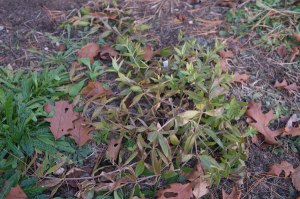
Weld – first season plants

Read Full Post »

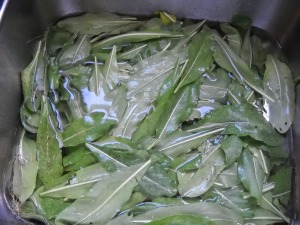
Woad leaves being washed in the kitchen sink

Woad grows well in my area, and I’ve just finished the first leaf harvest. I’m using the same process I used last year – extracting the indigo in a solution and then evaporating it until I’m left with indigo powder that I can use next winter in an indigo dye vat.

My scale wasn’t large enough to weigh the leaves, but I’d say there are about 700 grams in this first cutting.

There were three sources of information that I followed: the directions in the book Wild Colour (revised ed.) by Jenny Dean, the directions that Sarah Dalziel has included on her website http://www.woad.ca, and the directions that Teresinha Roberts has included on her website http://www.woad.org.uk/html/extraction.html.

There aren’t very many supplies needed, but I would recommend buying litmus paper to determine the pH level of the solution at the various stages of the process.
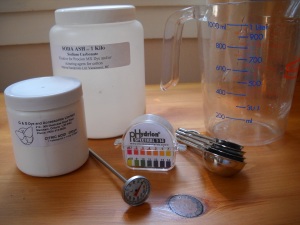
Here are my dye supplies. The citric acid and soda ash are used in small quantities, so these jars will do many batches.

Here’s what I did:

1. Cut and washed as many Woad leaves as possible, while still leaving enough on the plants to keep them growing. I think I had about 700 grams.

2. Put 7 litres of water in the 10 litre dye pot and added 2 tsp of citric acid to change the pH of the water to 3.

3. Heated the water to a rolling boil.

4. Ripped and added the Woad leaves and once the leaves were all added and stirred together, turned off the heat.

5. Half-filled the kitchen sink with water and ice cubes, and sat the pot in the sink to cool off rapidly. The directions I used indicated that it is best to quickly cool the solution to 50C.

I found that it took some time to cool that much liquid, so next time I’ll start with less water and add cold water to the pot to cool it instead of cooling the pot in the sink.

6. Let the leaves soak for about 30 minutes (I checked after 20 minutes, and the water still looked very clear, so I left them for another 10 minutes).

7. Scooped out the leaves and squeezed them to save as much solution as possible.

8. Added about 4 tbsp of soda ash to raise the pH of the solution to 9 – 10.

The solution still seemed pretty clear, but it did change in colour from reddish to greenish as it’s supposed to.

9. Using my hand-held mixer, I beat the solution for about 15 minutes to add air. The surface foam did change from very light yellow through green and blue and back again to yellow during this time.

10. I didn’t have enough glass jars to decant the liquid, so I’m letting the solution settle in the pot for a few days.

Next Steps:

Once the solids start to settle, I’ll remove the clearer liquid from the top of the pot and top it up with a little fresh water – this seems to help the solids settle out.

Eventually, the liquid evaporates and the remaining solids will be added to my little bottle of powered indigo from last year!

November 10 update:

The settling and evaporation were completed some time ago, and it looks like there’s about a gram or two of indigo sediment in the pyrex pie plate that was used as the last evaporation pan. It’s hard to get the sediment off the glass, so next time I’ll try to find an unscratched teflon pan to use in this final step. Once the sediment is all scraped off, it will be added to the gram or so that I got last year and as it’s way too little to make an indigo vat, I’ll try to use it as a pigment painted on a soya-milk prepared cloth for a Katazome project.


Read Full Post »