Woad grows well in my area, and I’ve just finished the first leaf harvest. I’m using the same process I used last year – extracting the indigo in a solution and then evaporating it until I’m left with indigo powder that I can use next winter in an indigo dye vat.
My scale wasn’t large enough to weigh the leaves, but I’d say there are about 700 grams in this first cutting.
There were three sources of information that I followed: the directions in the book Wild Colour (revised ed.) by Jenny Dean, the directions that Sarah Dalziel has included on her website http://www.woad.ca, and the directions that Teresinha Roberts has included on her website http://www.woad.org.uk/html/extraction.html.
There aren’t very many supplies needed, but I would recommend buying litmus paper to determine the pH level of the solution at the various stages of the process.
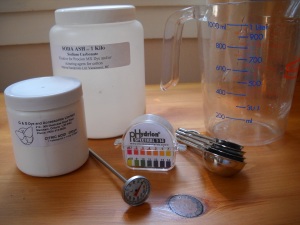
 Here are my dye supplies. The citric acid and soda ash are used in small quantities, so these jars will do many batches.
Here’s what I did:
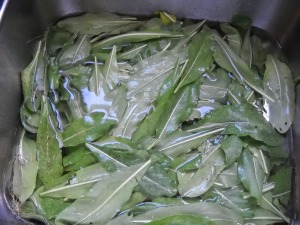
1. Cut and washed as many Woad leaves as possible, while still leaving enough on the plants to keep them growing. I think I had about 700 grams.
2. Put 7 litres of water in the 10 litre dye pot and added 2 tsp of citric acid to change the pH of the water to 3.
3. Heated the water to a rolling boil.
4. Ripped and added the Woad leaves and once the leaves were all added and stirred together, turned off the heat.
5. Half-filled the kitchen sink with water and ice cubes, and sat the pot in the sink to cool off rapidly. The directions I used indicated that it is best to quickly cool the solution to 50C.
I found that it took some time to cool that much liquid, so next time I’ll start with less water and add cold water to the pot to cool it instead of cooling the pot in the sink.
6. Let the leaves soak for about 30 minutes (I checked after 20 minutes, and the water still looked very clear, so I left them for another 10 minutes).
7. Scooped out the leaves and squeezed them to save as much solution as possible.
8. Added about 4 tbsp of soda ash to raise the pH of the solution to 9 – 10.
The solution still seemed pretty clear, but it did change in colour from reddish to greenish as it’s supposed to.
9. Using my hand-held mixer, I beat the solution for about 15 minutes to add air. The surface foam did change from very light yellow through green and blue and back again to yellow during this time.
10. I didn’t have enough glass jars to decant the liquid, so I’m letting the solution settle in the pot for a few days.
Next Steps:
Once the solids start to settle, I’ll remove the clearer liquid from the top of the pot and top it up with a little fresh water – this seems to help the solids settle out.
Eventually, the liquid evaporates and the remaining solids will be added to my little bottle of powered indigo from last year!
November 10 update:
The settling and evaporation were completed some time ago, and it looks like there’s about a gram or two of indigo sediment in the pyrex pie plate that was used as the last evaporation pan. It’s hard to get the sediment off the glass, so next time I’ll try to find an unscratched teflon pan to use in this final step. Once the sediment is all scraped off, it will be added to the gram or so that I got last year and as it’s way too little to make an indigo vat, I’ll try to use it as a pigment painted on a soya-milk prepared cloth for a Katazome project.


